In the world of mechanical industrial maintenance, one of the most vital concepts that is applicable to every operating machine is that measurements are extremely important. Measurements have a significant effect on the quality of the finished product, the quantity produced and the uptime of the machine. Everything that is manufactured is sized or has a dimensional tolerance target whether it is hot dogs or spaceship parts. When a maintenance technician is assembling, disassembling, maintaining or replacing components, taking measurements is imperative. Any machine Root Cause Failure Analysis (RCFA) process must include measurements, before, during and after the “failure.”
Dr. W. Edwards Deming, who is credited with starting the modern quality process, is legendarily quoted as saying “What gets measured gets done.” I think he may have borrowed on Lord Kelvin’s declaration, establishing absolute zero – “If you cannot measure it, you cannot improve it.” Or, you can go even further back to source the quote, to mathematician Rheticus. I generally agree with those statements, regardless of who said it first. But, learned people who understand business quality, management, marketing and productivity, such as Brian Strachman and the late Peter Drucker, caution us on the overreliance of measuring what doesn’t matter most. Multiple metrics taken at various times gives a balanced view of what is happening. These are the “key performance indicators,” or KPIs that allow management to change course, implement corrective measures and tweak the process. This strategy is most applicable to “A” criticality machines; if they stop turning, no widgets get made. In other words, don’t waste time on measurements that do not have a significant effect on the goal of safety, product quality, reduced operating costs or increased run time.
So how is taking measurements relevant to the average maintenance mechanic who is tasked with repairing broken machines? The mechanical world of industrial maintenance is full of opportunities to take measurements that matter: shaft coupling alignment, lubrication, V-belt tension and alignment, and the setting of gearbox bearings to name a few. Let’s use the installation, maintenance, lubrication and RCFA of rolling element bearings as an example. Three important issues relating to radial bearing performance are dimensional tolerance, fit and clearance, all of which involve measurements.
Rolling element bearings are manufactured to extremely close tolerances. What is a tolerance? It is a plus or minus allowable deviation from a set standard. Most quality manufactured bearings that comply with RBEC/ABEC/ISO published standards are made to within tens of thousands of an inch. The allowable amount is determined in part by the class of precision (1, 3, 5, 7, 9) and the overall size. The inner ring inside diameter, width, face axial run-out and bore radial run-out are measured and controlled. The same applies to the outer ring. The raceway geometry is tightly controlled and the rolling elements can approach near perfection. The only thing more precise in today’s world is nanotechnology. Every bearing and every part of the bearing is measured redundantly, using different means. A 25mm bore class 9 ABEC ball bearing inner ring has a plus zero, minus .0001-inch tolerance. That is the definition of precision.
This is an example of where and when you do not have to waste time measuring. If an exact part number replacement made by one of the reputable bearing companies is used, you can trust these manufacturers to produce a precise bearing. They employ redundant measuring processes, using a variety of methods to gauge every component.
The process of fitting a bearing onto a shaft and into a housing is a procedure where taking measurements are relevant to the maintenance technician. When a bearing fails and is removed from the shaft and housing supporting it, a common practice is to clean up both. Typically, some type of crocus cloth is used to remove the obvious corrosion or smooth out the galled surfaces, which results in material is being removed. I’ve witnessed the worst-case scenario where files and wire wheels were used. The original dimensions of both the shaft and housing were altered as a result, thus the fit has been changed. When this is done multiple times over the lifespan of the machine, the bearing inner ring may loosen on the shaft and/or the outer ring may creep in the housing. The result is less desired bearing life and more downtime. Bad tribal knowledge such as punch pricking or knurling the surfaces only hasten the destruction.
So how do we prevent this from happening? By taking accurate measurements. Use the Machinist’s Handbook or a bearing manufacturer’s published recommendations for the proper size of the shaft and housing based on the application. This is designated by an alphanumeric shaft or housing fit designation such as K5, which is probably the most common recommended shaft fit in the world. The suggested amount of press/tight or loose/slide differs with the size of the bearing, load, the application and which ring is rotating. Take multiple measurements at a minimum of four locations on the shaft and in the housing. Have another technician check the measurements for accuracy. If the measured components do not fall within the acceptable recommendations, replace them. Failure to do so only results in the repetitive madness of run-to-failure and ancillary damage to other machine components.
Bearing clearance is best described as the measurable space between the rolling elements and the raceway surfaces. It is critical to the life of the bearing because the internal space is required for free rotation of the rolling elements, lubrication film, thermal growth and allowance for the fit. Manufacturers produce a range of clearance typically designated C1 (rare), C2, C0 (normal), C3, C4 and C5, in that order; with C1 having less clearance, C0 (normal clearance) and C5 having the most clearance. As an example, a C2 bearing may be used to support a pump impeller. When noise or vibration is an issue, internal clearance is reduced. A C5 clearance bearing is recommended in applications that are hot, such as in an oven, where thermal growth of the rings will occur. On a cylindrical inner ring, the amount of interference fit will reduce the internal clearance. When mounting tapered bore bearings on a sleeve or journal, the clearance should be measured before and during the drive-up process by a feeler gauge. Mounted clearance targets based on bore size and clearance designation are published by manufacturers. Taking an excessive amount of clearance out of the bearing will result in significantly less service life.
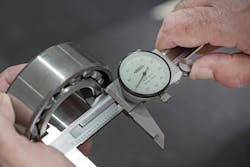
Measurements equate to success. Often, I’m brought in to determine the cause of a bearing’s so-called failure, and when I ask questions — Temperature? Shaft and housing size? Acoustics? Amp draw? Vibration readings? Baseline readings at time of installation? Total run time between replacements? — I hear … crickets. These are all measurements. I also hear the excuse, “They don’t give us enough time to measure” from the technicians. Hooey, I say. How much time does it really take to measure a shaft diameter with a dial caliper? Minutes. Measuring pays for itself.
The caveat: Having cut my teeth in the mining and paper industry, I know that production rules over maintenance. If management tells you to duct tape it, goop it, overtension it, tack weld it or wire it together, you do it. But we need to know there is a better way that will result in more uptime and less overall costs.
In conclusion, whether we are tensioning v-belts, aligning couplings, installing bearings, lubricating or torquing fasteners, measurements matter. Taking useful measurements are part of the solution to fix a lack of quality production. I recommend you watch the Brad Pitt movie “Moneyball,” based on the book by Michael Lewis. It’s entertaining and gets the point across.
- Measuring is a process of improvement
- Provide the measuring tools to the technicians
- Take measurements that matter
- Measure correctly and accurately
- Don’t measure once, measure often
- Have a target
- Record the data
- Analyze the numbers — how we keep score is important.
- Implement changes that lead to success
- Communicate the success and why it happened
- Repeat
“If you can’t measure it, you can’t improve it.” Peter Drucker
“The race isn’t just to the swift, it is to the precise. After all you must cross the finish line.” Richard Knotek


