As part of energy efficiency efforts, many installations include variable-speed drives to operate their pumps and motors. When a variable frequency drive (VFD) is commissioned, following guidelines makes the difference between installations that run for years and those with much shorter life cycles.
General guidelines apply to most drive brands, but reading the provided installation manual and documentation is important. Drive specifications vary by type, manufacturer and other parameters.
First inspect the drive to ensure that no damage occurred during transit. Make sure that the shipping container is in good condition and proper documentation and hardware has arrived, including options and accessories. Check the nameplate information on the drive motor, and if possible, check that information against the motor specification sheet.
If the motor is connected to a load, disconnect it. For tuning or identification purposes and to check motor rotation, first commissioning the drive with a motor not connected to a load is best, although not strictly necessary.
Drive mounting
The instructions typically include mounting dimensions. Whether the drive will be mounted inside or outside an enclosure, the process is typically the same. Smaller drives may be mounted on a DIN rail. Larger, heavier drives are bolted to a backplate or wall. The largest drives are standalone, in floor-mounted cabinets or even several cabinets.
Regardless of size or whether the drive is inside an enclosure or cabinet, space is always important. Drives, like people, keep cool by "breathing." The required space around the drive, including above and below, depends on the construction. In addition, a specified airflow may be called for. Failure to follow the instructions will result in a drive that does not operate properly, repeatedly trips on over-temperature faults and fails prematurely.
Whoever connects the power and motor must understand what makes for a good installation. Input protection, conduit runs and landing the wires at the drive all require attention to detail for efficient operation.
All drives need protection. A drive measures and monitors itself and its motor outputs, but a drive does little to protect itself against incoming voltage or current spikes. To protect a drive, the instructions will most often recommend a fuse type and size to place on the incoming (line) side of the drive.
Many fuse options are available. Follow the manufacturer’s recommendations for optimum protection. Circuit breakers are sometimes used in place of or with fuses, but unless previously specified, contact the drive manufacturer before including circuit breakers.
Wire the drive starting with incoming power from the mains. Whether the cable is new or existing, the electrician should check the insulation before connecting the mains or incoming drive points. If the insulation checks hold out (typically more than 1 megohm at 68 degrees F), then each phase of the mains and ground can be connected to the drive.
Typically, drive incoming power terminals are labeled L1, L2 and L3 (sometimes R, S and T), but confirm these with the instructions. Verify that the ground is also connected to the drive. Instructions include recommended wire gauge sizing and cable types.
Motor connections
Once incoming power is connected, add the motor. During this step, a good practice is to conduct an insulation check with the wire used for the motor. Once this is verified, the electrician connects each phase of the motor to the drive. Typically, the outgoing motor terminals on the drive are labeled with U, V and W (sometimes T1, T2 and T3) designations. However, this should also be confirmed.
Connect the ground from the motor to the ground of the drive. Ensure that the motor and incoming power are connected to the correct terminals. Powering up with improper connections can damage the drive.
Depending on the application and control scheme, connections to the input/output (I/O) terminals (digital and analog), fieldbus terminals (for example, Modbus remote terminal units and Devicenet) or encoder signals from motor to drive are next.
When connecting for I/O control, note what voltage the terminals accept. Typical digital inputs, for example, use a 24-VDC signal. A 115-VAC signal should not be applied to them. Instructions include terminal layouts, naming scheme and I/O. For signals from externally powered digital inputs, ensure that the ground from the external supply is connected to a digital input common as opposed to the internal digital input common for confirmation that the digital inputs are properly received by the drive.
Regardless of the control scheme, shield all signals to minimize the possibility of environmental noise pick-up. Most installations use metal conduit for required shielding.
In this event, note that the incoming power cable; the outgoing motor cable; and any control, fieldbus or encoder signal cables should be installed in their individual conduits. If not isolated within conduit runs, the high switching frequency of the output pulse-width-modulated wave — which controls the motor speed — and the higher voltage of those waveforms can cause interference with low-voltage signals carried over these cables.
If the cables are not in individual conduits in an enclosure and must cross, ensure that the motor cable and the low-voltage signal cables cross perpendicular to each other. This
minimizes possible interference.
Power up
Once all components are connected, the drive can be started. First, check the surroundings for loose items, tools or enclosure hardware. Double-check the connections and that the terminals are tightened to proper torque levels. No wires should be loose.
Reattach any hardware removed to access the drive terminals, and if the drive is in an enclosure, close its door. When powering up the first time, stand away so that a faulty drive or any overlooked material do no harm. Verify that the control signals are in the off position.
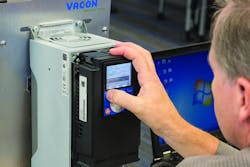
The keypad or PC-based tool can be used in commissioning a drive. You can use the keypad or PC tool to interface with and program the drive parameters. Both methods have benefits. Many drives include quick-start or setup wizards to walk end users through the process, while PC tools allow for a parameter search. Otherwise, the procedure is largely the same.
First program the nominal (or rated) motor parameters, found on the motor name plate or specification sheet. Most drives require a nominal motor speed and nominal motor current. Many require a nominal motor voltage, nominal motor power (in horsepower or kilowatts), nominal motor frequency and nominal power factor (sometimes referred to as "Motor Cos Phi").
Direction confirmation
At this point, verify that the motor rotates in the forward direction. Change to keypad control (or use a jog function, if available) to operate the motor for a short time at slow speed. Confirm the direction, and if it is wrong, take power-down precautions, wait for the capacitors to discharge to a safe level (included in the instructions) and have the electrician change any two motor connections on the output terminals. This will correct the motor rotation.
Use the drive to tune or identify the motor. Not all drives do this, but for micro-drives, low-power drives or HVAC drives, if "auto-tune" or "motor-identification" is available, use it. This allows the drive to run the motor uncoupled from the load through different speeds to define a profile for better motor control and protection than the basic nominal motor parameters provide. If the motor cannot be uncoupled from the load, most drives can tune or identify without the motor operating. This method does not offer as complete of a picture, but it is a good middle ground for better control and protection.
After confirming direction and tuning, complete the drive programming. Every application has specific parameters. Consult the instructions to better understand the available parameters within the drive. If needed, contact the drive manufacturer or a local drive expert to help get the most out of a drive.
Sean Gaffney is a senior product manager for VACON.
VACON, with global headquarters in Vassa, Finland, is a manufacturer of variable-speed AC drives for adjustable control of electric motors and inverters for producing energy from renewable sources.
VFD STARTUP CHECKLIST
Preparation
Read the manual and other instructions
Inspect the drive
Collect motor nameplate data or specifications
Disconnect motor from load (if possible)
Mounting
Mounting points
Ensure space for cooling
Electrical connections
Connect main power (L1, L2, L3 and ground)
Insulation check
Connect motor (U, V, W and ground)
Insulation check
Connect low voltage connections (I/O, fieldbus and Encoder)
Properly route conduit
Powering up
Remove loose objects from surroundings
Inspect all connections
Replace any panels or covers removed during installation
Stand away from the drive during power up
Commissioning
Program motor nameplate information
Test motor direction
ID run/motor tune
Program in additional application parameters
Test run to ensure proper installation /commissioning
Save parameters


